Combine Outlook Categories with a Word mail merge
Outlook Categories aren’t just for organizing. Susan Harkins show you how to use Outlook Categories to selectively merge contact information with a Word document.
Merging Outlook contact information with a Word document is a common task for Office users. Thanks to Outlook’s many sorting and grouping features, you can narrow the contacts sent in several ways. One way you can selectively choose contacts is to specify a category.
You might already be using Categories — they make a great visual tool, but they’re so much more! Categories are a useful tool for managing items by people, topic, priority, and so on. You can use them to sort, populate search folders, or to visually spot something. In this article, I’ll show you how to combine Categories with a mail merge to selectively manage the contacts sent during the merge. Like many features, Categories have improved with each version. On the other hand, that makes it almost impossible to cover all versions in a comprehensive manner. I’ll be using Outlook 2010, and you can apply the instructions to 2013 and 2007. Outlook 2003 Categories are texts, but the technique still works. I’ll note differences between versions when significant.
Putting Categories into play
The first time you apply a category, Outlook will ask you to name it. You can rename it, or not — but giving the category a meaningful name is helpful. If you don’t see a Categories field in the title bar, you can add it. Simply right-click the title bar and choose Field Chooser. Then, drag Categories from the resulting list to the title bar and drop it, as shown in Figure A. To move the field, click and drag it.
Figure A

Add the Categories field.
If you can’t see the title bar in Outlook 2013, enlarge the width of the listing pane a bit. In addition, Outlook 2013 calls it the Category field (not Categories).
To apply a category, select the item and then right-click that item’s Categories field. Then, choose a category from the resulting dialog, as shown in Figure B. (I’ve already given meaningful names to most of mine.) If you right-click any other field for the selected item, choose Categories from the shortcut menu to access the list shown in Figure B. You can assign more than one category to an item, and they’re not only for mail items.
Figure B

Choose a category.
If Categories isn’t available, you might have an IMAP account, which doesn’t support Outlook Categories. However, you can convert an IMAP account to a POP3 account, which does. Check with your administrator before attempting to convert your account.
Most of the time, you’ll use Categories to group and search items. You can skip this section and move right on to the merge. You don’t have to group your items first to merge. To group items by a category, click the Categories header in the title bar. If you’d rather, you can populate a search folder with categorized mail items as follows:
- If you have more than one account, click the appropriate account.
- Click Search Folders and then choose New Search Folder — or click the Folder tab and then click New Search in the New group.
- Choose Categorized mail under Organizing Mail.
- Under Customize Search Folder, click Choose.
- Select the appropriate category or categories (Figure C).
Figure C
- Click OK twice (Figure D).
Figure D
Let’s merge!
Now that you know your way around Categories, let’s use one with a mail merge. In the Contacts window (People in Outlook 2013), assign a category to a few contacts. Simply right-click a contact and choose Categorize. Then, choose a category.
When you’re ready to merge, do the following:
- Click the View tab.
- Choose List from the Change View option in the Current View group.
- Click Categories in the Arrangement group (Figure E), and Outlook will group your contacts by Categories. If you’re using Outlook 2007, choose Current View from the View menu. In Outlook 2003, choose Arrange By from the View menu, and then select Current View.
Figure E
- Select the contacts that you want to merge by selecting a specific category group or groups. I choose Family (Figure F).
Figure F
- Click the Home tab.
- Click Mail Merge in the Actions group. In Outlook 2007 and Outlook 2003, choose Mail Merge from the Tools menu.
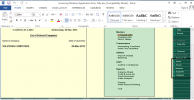
- Click Only selected contact in the Contacts section to limit the merge to the contacts you selected in step 4 (Figure G).
Figure G
- Select any other options (if any) for the current merge.
- Click OK. Outlook will launch Word. At this point, continue the merge session from inside Word, as you normally would.
If you’re familiar with the mail merge process, this quick selection technique will help you work more efficiently. If you’re not familiar with mail merge, don’t worry. You might not get everything right immediately, but with a little exploration, you’ll be merging in no time!
Source: Techrepublic.com